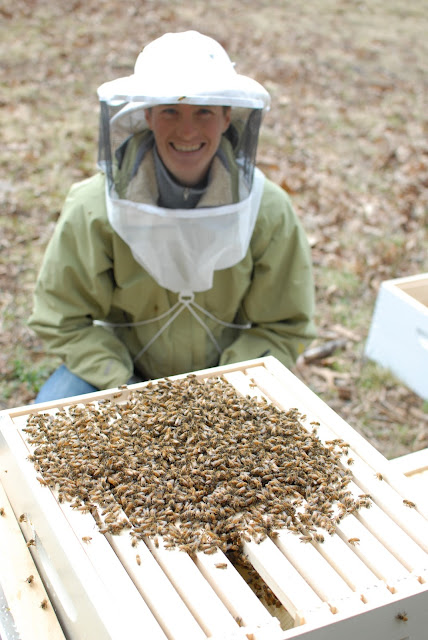
Tuesday, April 30, 2013

More babies!

Today marked the long awaited arrival of our chicks.  They were hatched on Sunday and shipped yesterday.  We have been hovering over the tracking information all day, and we were anxiously awaiting the phone call from the post office.  Finally at 12:30, the phone rang.  It was the postmaster in Bath (25 min from us) telling me that they had our chicks but that there was no truck scheduled to bring mail to our local post office until tomorrow.  He was wondering if we'd be willing to come down and pick them up.  We decided to make the sacrifice. ;)

When we got to the post office, we could hear them peeping long before they were in our little hands.  We opened the box when we were still there to make sure everyone made it in one piece.  All babes were present and accounted for -- and literally trying to hop out of the box! All the ride home, I couldn't stop peeking in at them...until one practically landed on my lap.

Once we got them home, we checked them for any potential chick health hazards, took their photos, showed them their water, and let them get settled.  I'm excited to see what their colors turn out like when they're adults.  We have two of each of the following breeds: Silver Laced Wyandotte, Barred Rock, Easter Egger (a.k.a. Araucana, Americauna; these come in a variety of colors -- we got them because they're good layers, and they may lay blue, green, or pink eggs), and Black Australorp.

They have been actively eating, drinking, and exploring their new abode.  Admittedly, a couple have gotten lost on the opposite side of the feeder from their friends. It is a little embarrassing, but I'm sure they'll figure it out soon enough.  Needless to say, they're wickedly cute. It can be a tad difficult to tell which chick is which breed at this point, but here are our best guesses.

Silver Laced Wyandotte #1

Barred Rock #1

Easter Egger #1 -- her name is Saffron

Easter Egger #2

Black Australorp #1

Black Australorp #2

Barred Rock #2 -- does this down make by butt look big?

Silver Laced Wyandotte #2 -- sooooooo sleeeeeeeepy....

And now, the good stuff:


Saturday, April 27, 2013

Sheet mulching -- party of 2

With spring drawing ever closer, and the day when we finally get to plant all our seedlings just around the corner, we need to get our garden bed ready.  You've heard me mention permaculture many times before, and this is one place where we're definitely putting it into practice.

Though I could easily write a very long post just about permaculture -- in short, permaculture is a design process and theory aimed at placing humans as part of the ecosystem and not apart from it.  The theory centers on the idea of working with the land as opposed to against it by mimicking what happens in nature.  For example, look at a mature forest -- no human is intervening with tilling, weeding, and fertilizing, but the forest thrives and has reached a balance of niche use through competition for resources.  So -- in the long run, this is what we're going for with our garden.  Obviously, there are some constraints to these ideas, and we'll never be able to grow a lot of the annual vegetables we love (tomatoes, peppers, etc.) with no work. We can, however, minimize the amount of work we have to do and minimize the damage we do to the land.  

In the long run, permaculture design practices lead to minimal weeding and garden tending....BUT....at the beginning, it can be quite an investment of time and energy.  The people we're getting to know through the local permaculture community often have work parties to help each other out.  While we have yet to be a part of one of these parties (we're still newbies), we understand there's more hanging out and chatting than actual working but with a big number of people, the work still gets done.  Sounds pretty good to me.  Because a work party is hard to throw when you're new to the area, we're working as a party of 2 -- and that makes for a lot of work.

One practice that is commonly used by permaculturists (permies) is sheet mulching, a.k.a. lasagna gardening, composting in place, etc.  The basic idea is that you can start a garden bed right on top of your existing lawn without digging at all, and with some ingenuity, you can get most of your materials for free.  While I could spend a ton of time explaining the ins and outs of sheet mulching, I'll point you to the 'ultimate, bomb-proof sheetmulching' from the author of Gaia's Garden -- a GREAT book for getting started with permaculture.  The quick and dirty of it is that you layer a number of things on top of your lawn, each with a specific purpose -- newspaper for carbon, seaweed for nutrients, compost for nutrients, etc. 

So....here we go...

We did decide to till this first year, and every time I go to a permaculture meeting, I feel guilty about our decision.  Several books I've read have said that tilling the first year is ok, though, so we decided it would be a good way to get things going on year one.  It also allowed us to level the garden a bit before planting anything. Our next step is to enrich the soil with some sheet mulching.  It is ideal to do the sheet mulch in the fall so it has the winter to break down and improve the soil.  You can do it in the spring and plant directly into the sheet mulch, though, so that's what we're doing.  We did a mini-sheet mulch this spring with plans for the mega-mulch this fall (hopefully with a bigger party).  

We're lucky enough to live on a salty river, so we get a lot of seaweed washing up among the detached, dried marsh reeds.  Let me specify that anything we've collected from the river has been detached -- we're not killing things to mulch our garden here.  So the first layer for us was a seaweed/marsh grass combo -- nutrients and carbon together!

Truck o' seaweed and reeds.

Delicious, mulchy goodness!
Dr. Trafton spreads seaweed like a champ.

After we spread the seaweed/marsh grass layer, we realized we should probably have mapped out our main path before covering the entire bed with mulch.  Since we're doing a lot of our own logging, we have a lot of brush to make wood chips -- perfect path material!  Our garden paths are going to resemble the veins of a leaf.  One other aspect of permaculture -- diverse plantings -- no straight rows, and plants are interspersed.  This mimics nature, and it helps control pests.  If you have a huge bunch of tomatoes, the hornworms are like....sweeeeeeeeet!  If you have one tomato plant surrounded by other things, they are less likely to destroy all your plants.  Here, we're just making the main path.  This one will be wheelbarrow wide with the branching veins being just foot path wide.

Adding chips to define the main path.

The next layer is going to be compost.  I wandered down to a neighbor who has lots of sheep and some llamas and asked him for some of his composted manure.  He was really nice and just gave us a truckload of it!  A few days later, Anna's dad showed up with a dump truck full of his composted manure.  We're still going to need more, but it is a good start for getting things going.

Sheep/llama manure on the left (already sheet mulched) and horse/chicken/yard waste compost on the right -- about to be sheet mulched.
Farm manager performs QA/QC mid sheet mulch -- at least he has a super sweet path to use!
One of many many many loads of compost dumped on the garden.
Seaweed and compost layers done -- that is a mighty fine path.  The traditional gardner in me wants to stop here -- it looks so pretty, but we've got to cover that soil.


After adding all this nutrient-rich goodness, we need a weed block.  Part of the benefit of sheet mulching is that you add a layer to block weeds (and hopefully day lilies, in our case).  This can be a number of things, but we're going with newspaper thanks to our NYT subscribing friends. :)

After the newspaper, you want something to hold in moisture.  By enriching the soil and building more soil, the garden will hold a lot more moisture on its own requiring less additional water from us. Here we were unable to source for free, broke-down, and bought bales of straw.  You don't want to use hay here because it may have grass seeds.  It would be perfectly fine to use hay on your layers below the weed block, however, as they won't be able to germinate and grow.

Wheelbarrow o' wet newspaper -- we still had to add a bit at the end.  

Wet newspaper, then straw.

Mighty-fine sheet mulching, if I do say so myself.

Oh, hey! You made a cozy bed just for me!

Seriously, could he possibly be cuter?

Almost done!

The final product....of half the garden. We have one more epic sheet mulching day in our future.  Also, look closely -- the farm manager is still there. :)

Even though I've read the books, talked to people, and have clearly drunk the permaculture kool-aid, while we were laying newspaper and straw over our lovely compost, I was thinking, "What the hell are we doing?!?!?!" While I totally subscribe to not having exposed, bare soil, it just felt wrong to be putting newspaper and then straw on everything. We're committed to these methods for this year, and I'm hoping the more we learn, the more we find it less crazy.


Saturday, April 20, 2013

Bzzzzzzz!

Bees have arrived!  This is going to be mostly a photo chronicle of our bee arrival and installation today. Let me (Jessie) start by saying that Anna is a total badass....though the photographer wasn't too bad, either. :)
Anna went to Bowdoinham to pick up our bees from the guy who taught her beekeeping course.  Of course, it was cold, cloudy, and raining which makes for grumpy bees, but bee pick-up is rain or shine.  After watching him put in a couple hives, Anna got our bees and headed for home.  This is how the late morning transpired:

A box 'o bees -- we had two of these for our two hives.  They were buzzin', and the sun came out for their arrival!

Anna dons her veil in preparation for putting the bees in the hives.

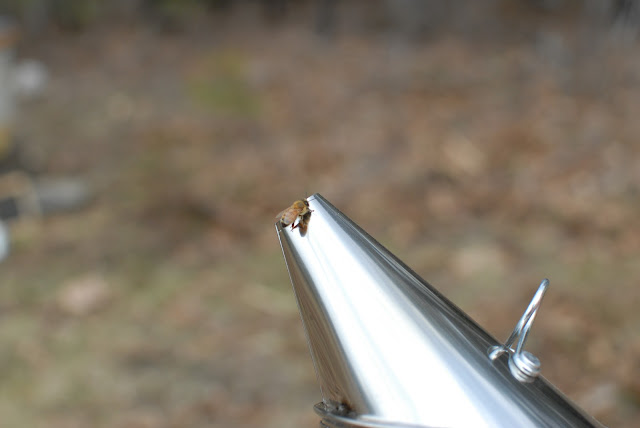
Smoker at the ready in case they were testy -- we ended up not really using this as the ladies were pretty docile.

Ready and waiting...
When Anna was watching her instructor put the bees in his hives, he was explaining how the bees have nothing to defend, so they're unlikely to sting you....and then he got stung on the neck.  We both knew that we had to be as calm as possible.  The bees can sense your fear, and it makes them more nervous and aggressive.  That being said, my heart was pounding, and I was just the photographer.  Anna channeled her inner yogi, took deep breaths and rocked it.

First, you have to remove the jar that fed the bees while they were in transit.  This also exposes the queen. (this picture is obviously from our second hive as the first one has bees on it, but it was a better pic)

Here, Anna's removing the case that holds the queen.  The workers and drones will follow their queen, so first you put the queen where you want the bees, then you add the bees. 
The queen is in a case that has a cork closure -- here Anna's removing the cork...and bees are on the move!
Once the queen is in the hive, she's still surrounded by a sort of candy.  This ensures that the bees will go into the hive (we hope!), and they eat the candy surrounding her releasing her into the hive to start laying eggs and building the colony.  Getting the bees into the hive is the good stuff...

Yep -- you just shake the box and dump them in there.  It is kind of scary and amazing at the same time.

More bee pouring....they're pretty awesome.

That's one happy beekeeper. :) One hive down, one to go.
Now that the bees are in their hives, we just have to feed them for a bit until the flowers start blooming. Their job right now is to set up their home and get settled....honey making comes later.  We may not get honey this year, but we just might.  I have a feeling Anna's going to be an amazing beekeeper and we'll get lots of sweet golden goodness. :)

Carefully putting the lid on -- no one wants to get squished!

Adding the food bucket -- it's full of sugar water and has a mesh screen on the lid. A vacuum is created when you turn it upside down, and the bees can grab a snack when they want one. 
Closing up the hive...our work here is done!

The finished product -- they're still figuring out their new homes here.  By the end of the day, there were almost none outside the hives. :)
Clearly, our smoker was ineffective.

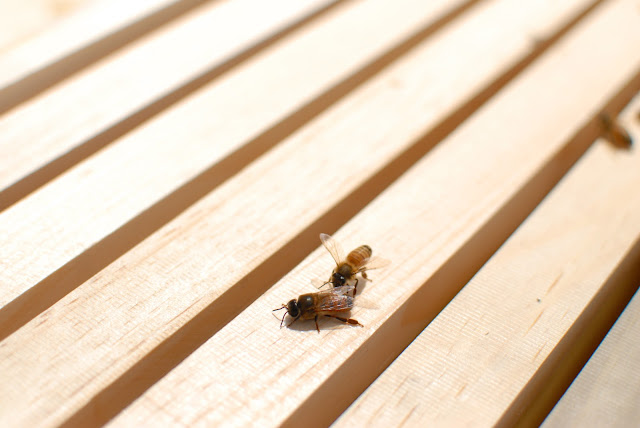
Anna said, "Ooh, there's a drone!" Most of the bees are females, but the drones are male.  They can be differentiated from the females by their bigger size and bigger eyes.  Here, I got brave and went in for a close-up. The drone is in front, and the worker is in the back.  Yes, the ladies do all the work while the drones hang around the hive eating the food and being pampered by the ladies. Their only job is to breed with a queen.
As always, the farm manager oversees all major projects.

We survived, and the bees are in their new homes. :)
Photographer extraordinaire. 
And, to answer the question that everyone is wondering -- we didn't get stung even once! :D


Friday, April 19, 2013

Ducklings!

We always knew we wanted chickens for eggs, and we had discussed getting ducks to add to the egg production and facilitate serious slug eating.  The prospect of having to provide a duck pond was too daunting to make us really consider it....until now.  As I've posted before, I'm taking a permaculture design course this summer, and last weekend was our first meeting.  While the course made me question our decision to till this first year, it also solidified my desire for us to have ducks.  One of the 'fathers' of permaculture said, "You don't have a slug problem, you have a duck deficiency."  Ducks are excellent foragers of critters that eat your garden, but they won't eat your garden like chickens.  So, midway through the weekend, I texted Anna and told her we needed to get ducks, and we needed to do it in the next two weeks.  I'm more concerned about the chickens picking on the ducks than vice versa, and our chickens arrive in just about a week and a half.  We did some research, and we were lucky to find a local source of ducklings!  :)

We're ready and waiting!
Given that ducklings and chicks have similar requirements, we were pretty close to being set up for ducklings, but this just shortened our prep time.  We drove about an hour south to get our babies.  They are Khaki Campbells (though, admittedly, they're not purebred), which are known for their laying ability, and they're supposed to be good foragers. Under ideal conditions, we'd get day-old ducklings so that they might imprint on us and not be scared, but we were only able to find 2-week old babies.  When we picked them up, it was clear they weren't kept under the best conditions (they were staaaaanky), and they were pretty scared of us.  We're committed to having, at least, friendly ducks, so we're holding them a lot, and making frequent visits to their pen.  In the two days we've had them, they are making some serious strides towards not being afraid.  They still don't like the act of being picked up, but most of them calm down within a few minutes.  All but one of them has a name, and we're just waiting for the last one to tell us his/her name.  We don't know if they're male or female, but regardless of how it turns out, their names will stick, I'm sure.

Now, for what you've been waiting for....


Day 1 -- they're a little freaked here.  The yellow thing is their heater -- they're safer than heat lamp on the fire front.

Here I am holding Fern.  Her name comes from that she seems to be really calm and sensitive -- we love sensitive ferns (yes, that's a nerdy botanical reference)!
 In the wild, ducklings get a dose of their mothers oil to coat their downy feathers, so without her, they're susceptible to becoming water-logged and can easily drown when swimming.  We've opted for supervised swimming at this point. :)

Today was their first swim in the bath tub. We chopped up some greens so they could dabble for them. We're working on their pond outside, but they're not quite outdoor ready -- or maybe we're not ready for them to be outside.
Now for the ridiculously cute...


Monday, April 15, 2013

New tractor day!

Not that I want to glorify acquiring material things, but......today was new tractor day!  When we moved here, there was a tractor already here that we would use for logging, mowing, tilling, etc.  Recently, however, Anna's dad mentioned that he'd like his tractor back so we were in the market for a new tractor.  This is actually a good thing since we'll have the ability to grow with our tractor, learning all it's quirks, idiosyncrasies, etc.  After a lot of research and a steep learning curve of tractor knowledge and lingo, we settled on the John Deer 5075E - it is just about the same size as the tractor we've been using, and it has enough power to do what we need it to do.  It's a mighty fine looking tractor, if I do say so myself -- she hasn't revealed her name to us yet, but she's definitely a chick. :)

The farm manager oversees the tractor's arrival.

Anna's really excited for tractor delivery -- Oliver's nonplussed.

After an afternoon of tractor learning (hauling wood and chipping wood), no better way to celebrate than delicious Costa Rican rum in the sun.  More details on the pending duck pond that created Anna's mud-caked Carhartts in an upcoming post. We may just have the best life ever. :)

Friday, April 12, 2013

One step closer to spring...

On this rainy/sleety/snowy day in mid-April, I decided to think spring!  We have been itching to get things going on our garden, but when the snow was just about melted, we got another foot of snow. So we sat back and did some more planning.  When the snow finally melted the second time around, we just had to wait for it to get dry enough to till....that and we needed the tiller.  Anna's dad has a tiller that he's had since they cleared the land that their house is on -- so roughly 35+ years.  He brought it over to let us borrow it and then told us we could keep it since he hasn't used it in 5+ years.  Yesterday was dry enough, and with the forecast for rain for the next few days we had to take advantage of this window of opportunity.

We knew that the existing garden beds had good soil, but we weren't optimistic about the state of the rest of the field.  Our reasoning behind these suspicions were that the field is covered with thistle, and we've read that thistle likes poor nutrient soil.  We did learn, however, that lupine is a nitrogen fixer, and we also have a lot of that.  That bodes well for our soil. :)

We were also expecting some pretty huge rocks in the garden, but we were ready for the challenge. We pulled back our tarps, marveled at the growth underneath -- turns out plants like warmth. ;)  They weren't too pleased with the lack of sun, however, and were looking quite anemic. We were pleased with the results of our little experiment.

You can clearly see where the tarps used to be.  For those who are wondering -- still old tractor.

Once we started tilling, however, we couldn't have been more pleased!  The soil looks dark, rich, and beautiful.  With the exception of a couple huge rocks, there were only really small rocks.  


See how good and rich it looks?  We are getting more and more optimistic. 

Anna is a tilling machine...or at least a tilling machine operator. She rocked it!

We decided to do a couple passes on this first go to help break up the weeds -- we're also using this opportunity to try to level the garden a bit.  It isn't too sloped, but one end is a bit steeper than the other.  Also, our garden plan isn't going to be shaped in a rectangle, but for this tilling operation, it was easier.  We're going to work out the final shape of the garden with sheet mulching and shovels.

Farm manager, reporting for duty.

The supervisory crew. Olive is still afraid of the tractor, which is OK with us!
Oliver, obviously, is not afraid of the tractor.

Our plan is to only till the garden this first year, then we're going to use sheet mulching and directed plantings to enrich the soil.  One thing we're going to to be fighting with for a long time is day lilies.  They may look nice, but I don't really want them in the middle of my veggie garden.  Our property is certainly not lacking in the day lily department, so if you want some, let us know!


The finished, covered (mostly) project.  You can see where some of our transplanted apples are as well (the dark circles of compost further down the field).

Both Anna and Olive are happy that the tilling is done. 
While the soil we turned up looks pretty good, we're getting our soil tested just to see what we're going to be starting with this year.  We took samples from the garden, the orchard, lower down in the field, and the terraced beds behind our house (future home of insect and bird attracting plants as well as herbs).

From the top left, clockwise -- orchard, terraced beds, garden, lower field.

We feel so good now that the garden is tilled -- it's like we're one step closer to the beginning of spring. Now we just need it to get warm enough to plant all the seedlings we have growing in the basement.